Property Photography: How to Make Your Home Stand Out Online
(13)1.png)
When buyers search for a home online, your photographs make the first impression. Before they read the full description, study the floorplan or arrange a viewing, they will usually decide whether the property looks relevant and appealing from a small set of images.
That makes photography one of the most important parts of your property presentation.
Property portals create visibility by placing your home in front of active buyers. Photographs help turn that visibility into clicks, enquiries and viewings. A well-priced property can still be overlooked if the images are dark, unclear or poorly ordered.
This guide explains how to prepare your home, take effective photographs and select the images that will present it at its best.
Why property photography matters
Online property searches move quickly. Buyers may compare dozens of homes within the same location and price range, often viewing the first photograph before deciding whether to open the full listing.
Strong photography helps buyers:
- Understand the size, layout and condition of the property
- Identify its most attractive features
- Imagine how they might use the rooms
- Decide whether it meets their needs
- Feel confident enough to arrange a viewing
Photography cannot compensate for an unrealistic asking price, but it can ensure that a suitable property is not dismissed because it has been presented poorly.
This is central to Emoov’s three Ps of selling a home: price helps a property compete, presentation earns attention and personal service helps turn interest into progress.
Portals provide the audience; your photographs earn attention
It is easy to focus entirely on which property portal carries a listing. Portal exposure matters, but appearing on a website is only the beginning of the marketing process.
Emoov markets properties on Rightmove, Zoopla, OnTheMarket and Emoov, providing credible online visibility without relying on one particular website. Wherever a buyer discovers the property, they will respond to the same elements: price, photographs, floorplan, description and key details.
The portal provides the shop window. Your lead image persuades someone to stop and look; the complete set of photographs helps them decide whether to enquire.
You can read more in our guide to how property portals work and whether a home needs to appear on every portal.
Prepare each room before taking photographs
Good property photography begins before the camera comes out. The aim is not to remove every sign of personality or make the home look artificial. It is to make each room clean, clear and easy to understand.
Declutter without making rooms feel empty
Remove items that distract from the space, particularly from floors, worktops and windowsills. Buyers should be able to see the room itself rather than the belongings inside it.
Before taking photographs:
- Clear shoes, coats, bags and post from the hallway
- Remove laundry, drying racks and visible cables
- Clear most toiletries from bathrooms
- Clean kitchen surfaces and put away washing-up equipment
- Make beds and straighten bedding
- Arrange cushions and soft furnishings neatly
- Remove excess furniture if it makes a room feel crowded
- Hide bins, cleaning products and pet equipment where practical
A few carefully chosen items can make a room feel welcoming. The objective is clarity, not complete emptiness.
Protect personal information
Check every room for photographs, post, documents, computer screens, calendars, certificates and anything else that displays personal information. Remove these before taking the pictures.
Also avoid including people, car registration numbers or anything that could create an unnecessary privacy or security concern.
Prepare the exterior
The outside of the property is often the best choice for the main listing image, so give it the same attention as the interior.
Where possible:
- Move cars, bins and hoses out of view
- Sweep paths and tidy the entrance
- Mow the lawn and trim untidy plants
- Remove broken pots, toys and garden clutter
- Clean accessible windows and the front door
- Open patio furniture or dress seating areas neatly
If significant building work, scaffolding or waste is present, consider whether photography should wait until the work is complete.
Use light carefully
Natural daylight normally produces the clearest and most welcoming interior photographs. Choose a bright day if possible, open curtains fully and raise blinds.
Turn on lamps and main lights where they make the room feel warmer or reduce dark areas. Check that bulbs work and, if possible, use bulbs with a consistent colour rather than mixing very cool and very warm light.
Avoid photographing directly towards a bright window. This can make the room appear darker than it is. Try moving to another corner or adjusting the angle so the window is not dominating the centre of the image.
For exterior photographs, look at the direction of the sun. A front elevation photographed with the sun behind the property may appear shadowed. If possible, return at a different time of day when the front is evenly lit.
You do not need an expensive camera
A professional camera can produce excellent results, but a recent smartphone is capable of taking strong property photographs when it is used carefully.
Before you begin:
- Clean the camera lens
- Select the highest practical image quality
- Turn off filters and portrait effects
- Use the standard camera setting for most rooms
- Use a wide-angle setting carefully in smaller spaces
- Avoid digital zoom, which can reduce image quality
- Keep the phone level and use the on-screen grid if available
Wide-angle lenses can help show a room, but excessive use can distort its size and make walls or furniture appear stretched. The photographs should make the property look appealing while remaining accurate.
Photograph in landscape orientation
Landscape images generally display more effectively on property websites because they fit the usual listing format. Portrait photographs may be cropped or shown with borders, reducing their impact.
Hold the camera horizontally and keep it straight. Vertical lines such as doors, windows and the corners of walls should look upright rather than leaning.
For most interior photographs, position the camera at around chest or waist height. Photographing downwards from head height can make walls appear to lean and reduce the sense of space.
Choose angles that explain the room
Stand in a doorway or corner so the image shows as much of the room as possible. Try to include two walls because this gives the photograph depth and helps buyers understand the shape of the space.
Avoid aiming directly at a blank wall or allowing a large piece of furniture to block the foreground. Take several versions from different positions and compare them later.
Each image should have a purpose. It might show:
- The overall size and shape of a room
- The relationship between two connected spaces
- A particularly attractive feature
- A useful view from a window
- The garden, parking or outside space
- The condition of a kitchen or bathroom
Do not use unusual angles simply to make a room look larger. Accurate photographs build trust and help ensure that viewing expectations match the real property.
Show the whole property without repeating yourself
The ideal number of photographs depends on the size and type of home. There should be enough images to explain the property properly, but not so many that buyers see the same room repeatedly from almost identical angles.
A typical sequence might include:
- The strongest exterior or interior image
- Main reception room
- Kitchen
- Dining or second reception space
- Principal bedroom
- Additional bedrooms
- Bathroom and other important rooms
- Garden, balcony or terrace
- Parking, garage or useful outbuildings
- A final exterior or lifestyle feature
Smaller rooms should still be included when they are relevant, but not every cupboard or minor detail needs its own photograph.
Take more photographs than you intend to publish. This gives you a choice of angles and allows you to remove any images that are blurred, repetitive or unflattering.
Select the right cover photograph
The cover photograph is the image buyers see in search results, so it carries more responsibility than any other picture.
The best choice is usually the image that makes the property most immediately recognisable and appealing. This might be:
- An attractive front elevation
- A bright kitchen or open-plan living area
- A substantial garden
- A distinctive view
- An architectural feature that separates the home from its competition
Choose the image most likely to interest the right buyer, not necessarily the first photograph taken. Make sure it remains clear when viewed as a small thumbnail.
Review every image before uploading
Look at the photographs on a larger screen if possible. A problem that is difficult to notice on a phone can become obvious on a laptop or desktop monitor.
Check for:
- Blurred or low-resolution images
- Crooked walls and horizons
- Dark rooms or overexposed windows
- Reflections of the photographer in mirrors or glass
- Personal information or people in the background
- Open toilet lids, untidy bedding or overlooked clutter
- Repeated images that add no new information
- Features that appear misleading because of distortion
Only upload photographs that help explain or promote the property.
Uploading and arranging photographs in your Emoov dashboard
The exact wording and layout of the dashboard may change as the system develops, but the general process is straightforward:
- Sign in to your Emoov account.
- Select the property you are selling.
- Open the option to manage or edit the listing.
- Go to the property-details and photography section.
- Upload the selected landscape images from your device.
- Wait for the upload to finish before refreshing or leaving the page.
- Arrange the photographs in the order buyers should see them.
- Select the strongest image as the cover photograph.
- Remove or rotate any unsuitable images.
- Save the changes and complete the remaining listing steps.
Available photo allowances and optional photography services depend on the package selected. Check Emoov’s current sales packages for the latest inclusions rather than relying on an older guide or price.
Photographs will appear on the live listing after the property details have been reviewed and approved by the Emoov team.
Before you publish: a final photography checklist
- Rooms are clean, tidy and easy to understand
- Curtains and blinds are open
- Suitable lights are switched on
- Personal information has been removed
- Exterior areas are tidy
- Images are sharp, level and in landscape format
- Wide-angle distortion has been kept under control
- Every important room or feature is represented
- Repetitive or misleading images have been removed
- The strongest photograph has been selected as the cover image
- Images have been placed in a logical order
Final thoughts
Effective property marketing is not simply about appearing on a portal. Buyers must notice the listing, understand the home and feel motivated to arrange a viewing.
Price determines whether a property feels competitive. Portal advertising provides visibility. Photography creates the first impression, while accurate details, responsive communication and personal support help maintain interest.
Take time over your photographs and judge every image from a buyer’s point of view. If you are unsure whether your photographs are suitable, contact the Emoov team before the listing goes live. A little guidance at the beginning can make the entire advert clearer, stronger and more persuasive.
Useful Links
Sell Your Property
Selling Frequently Asked Questionss
How to de-clutter and organise your home
How To Maximise Your Property's Exteriors For A Quicker Sale
Free Online Valuation
.png)
The 3 Ps That Sell a Home: Price, Presentation and Personal Service
27.09.2026Learn the 3 key factors to selling your home successfully. Expert property selling tips from Emoov’s Nick Neale.
(11).png)
Sell or Let Your Property Online: Stay in Control with Emoov
23.09.2026Selling or letting a property no longer has to mean handing over thousands of pounds to a traditional estate agent.
Update: Emoov Is Staying on Rightmove
15.09.2026An update from Nick Neale, Director of Emoov, on our decision to stay on Rightmove and what it means for our customers.
Rightmove vs Zoopla vs OnTheMarket: Which Property Portal Is Best?
09.09.2026.png)
What Happens After You Accept an Offer? A Guide to Sales Progression
24.08.2026Accepting an offer on your property is an exciting moment, but it is not the end of the selling process. It marks the beginning of the legal and administrative work required to move the transaction towards exchange of contracts and completion.
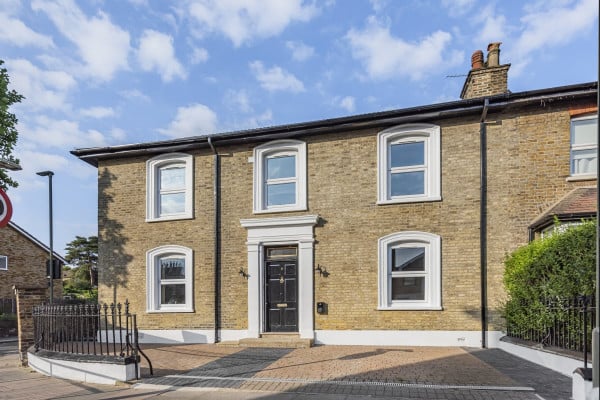
Why Some Homes Are Selling in 2026 - And Others Are Not
21.07.2026Discover why some homes are attracting viewings and offers in 2026 while others struggle.










The legal stuff
Emoov is a trading name of Griffin Residential Limited. Griffin Residential Limited is a company registered in England and Wales. Company Reg No. 09362284.